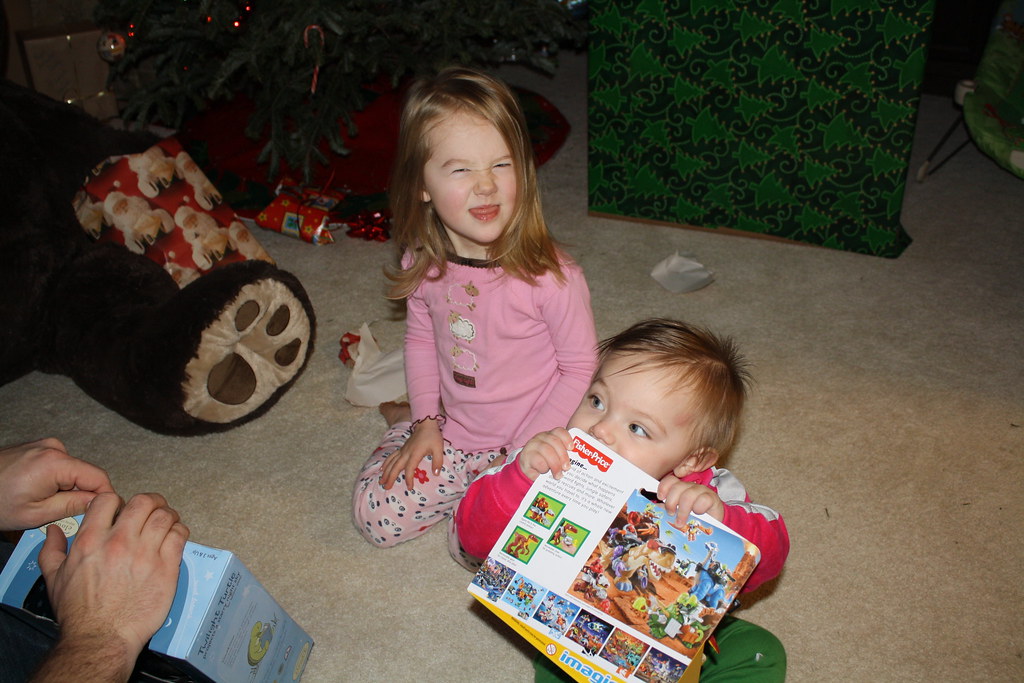
Monday, January 30, 2012

gretchen is ONE

I can't believe my little baby is ONE already! These last 365+ days have flown by so fast I'm not sure what happened. Gretchen has always been a happy girl, very happy-go-lucky. I was please that I've never had to rock her to sleep, however, she has spent a great deal of time waking up at night.

She's had to deal with a lot considering her sister pushes her around, steals her toys, and doesn't share. Even the dog wacks her with his tail and eats her food. She's the bottom of the food-chain but has somehow managed to hold her own around here. Gretchen's bedroom started out in our room, then she slept in the bathroom at my mom's house, got her own bedroom (although horribly pained with no decorations), and finally has a cute little room she can grow up in.

Here's a rundown of our dear little Gretchen.
  • Eats everyting you put in front of her. Loves noodles, blueberries, strawberries, PBJ, cheese, etc.
  • Drank whole milk at 11 months and made no fuss switching from formula.
  • Walks with the walker toy.
  • Stood for a max of 1 minute but hasn't yet attemped to walk on her own.
  • Loves to crawl....fast.
  • Goes up any stairs when you are not looking.
  • Makes the sign for "milk" when she wants it
  • Says Dada and means it. We're still working on Mama.
  • We think she said doggie too.
  • Takes two short naps during the day and sleep around 11-12 hours at night but still wakes up plenty.
  • Wears size 5 wide shoes.
  • Is larger than her sister at the same age.
  • Grew 4 inches in the 6 months we've lived here.
  • Wants nothing to do with baby toys.
  • Chews on everything she can.
  • Crawls away when you catch her doing something naughty.
  • Loves her blankie, both full-size and travel size.
  • Still has a nookie.
  • Has rosy cheeks most of the time.
  • Gives mom and dad the best cuddly hugs and nuzzles.
We love you Gretchen!!

Sunday, January 29, 2012

princess jasmine costume

I took Charlotte to a Snow Princess party this weekend. It was an annual fundraiser put on by the Junior Womens' Guild of Cedarburg. Since she's also having her Aladdin birthday, I had to finish her Jasmine costume in time for the party.


Princess Jasmine
Charlotte was the only Princess Jasmine there and was her usual self, dancing in the middle of the room to her own tune. She wanted to be by the "real" Disney Princesses (high school kids) the entire morning. Sharing her thoughts and waving around her magic wand. Instead of buying a costume, I made one and wanted to share how I put it together. Really, give it a try! You can find a rough shoe tutorial here.

I made the pants with a pajama tutorial I found here and a harem pant tutorial here.

I wasn't sure how I was going to make the top but found a tank at Target in the exact turquoise that the pants were. So, I embellished the top a little with gold trim and some sparkly chiffon around her shoulders. After turning down the edges to prevent fraying, I pinned it on the shirt and stitched it down in four places, make sure she can lift her arms and move around. I think the bad was about 4 inches wide. 

The crown is usually turquoise but I wanted to make it gold and in the shape of a crown. I interfaced some gold silk (same as the shoes) and drew out a crown shape. Stitch both sides, turn inside out and fold in the edges. Make sure you measure the head so you know how long to make the crown. Add velcro at the appropriate length. I found a plastic jewel at Michael's and hot glued it down. Also made a small stitch, just in case.

Voila, you're done! Charlotte loves her costume and I'm very pleased with it as well.


Wednesday, January 25, 2012

princess jasmine arabian shoe tutorial

Shoes I'm making the covers for.
My daughter loves Aladdin and really wants to have an Aladdin birthday party next month. She'll be three and I can hardly believe it. How better to celebrate than with a Princess Jasmine costume. We are also going to a Princess Tea Party this Saturday and I wanted to have the costume finished for the party. Unfortunately, we don't have gold sparkle shoes for her. The ones she has are pink. With a little gold silk left over from the costume, I thought I'd take a shot at making Arabian shoe covers for her to match the costume. Well, it turned out fabulous!

It's a messy tutorial and I don't have a photo with the costume yet, but I assure you, Charlotte LOVED the shoes!!

First I took the gold silk and folded over the edges so the fabric doesn't fray. After sewing one side, I laid it over the shoe and measured how far over the fabric would lay and then stitched up the other edge.

add interfacing
Since I wanted the shoes to have a pointed toe and silk frays a lot, I added interfacing to both pieces (one for each shoe).


stich edge to create point
Next I stitched one end closed and used a pinking shears to trim the edge. Don't forget to snip the corners on a diagonal so you get a nice point!

Here's a (bad) picture of the form so far. It's laid over the shoe, so you can see the point. We are getting ready to add elastic on the bottom and cut out an opening for the foot.

I didn't do this next step scientifically. If you have a better way of getting the hole cut, then go for it! I marked with a pin where the elastic part of the pink shoe was. I want the gold fabric to cover most of the elastic. Then I drew a line with fabric marker where I am going to cut. I left a small margin, maybe 1/4" or less, so that I could fold down the edge and stitch. Here's one shoe finished and one shoe getting ready to be cut. Good luck!

Fold over the edge where you cut and pin down. This is where you're happy we have interfacing to keep down the frayed edges. Clip the corners and stitch down.
Flip the shoe over, add the gold fabric cover and measure to add elastic to the bottom. I've added elastic to the toe and the back of the shoe.


add elastic to hold down the gold cover


Creating the back of the shoe isn't hard. I vaguely measured how long the fabric needed to be when the form was on the shoe. Next I stitched the raw edges together just like when we made the point. However, we don't want a point on the back of the shoe. Turn the gold form inside out and place back on the shoe. Then I took the point and smushed it down and pinned it. We are going to make a straight stitch vertical on the seam to hold down the flap.


Here's a photo of the completed back of the shoe turned right side out.


add elastic to the back of the shoe as well

 Finished shoes! I think I'm going to add some bling to the top toe part. Let your imagination fly!

princess jasmine costume

Tuesday, January 24, 2012

handy hand towels

If you haven't discovered Pinterest, don't! It will suck you in. But, thanks to Pinterest, I found this amazing tutorial from The Creamer Chronicles. A cute hand towel that is attached to the stove handles. Perfect because Gretchen is always pulling them down. AND...now I have some red ones that match the new kitchen color.


In love!!

Monday, January 23, 2012

january bee block

A few weeks ago I finally went to a Milwaukee Modern Quilt Guild monthly meeting. It was great to meet other women in the area that love quilting as much (or more) than I do. After the meeting I was asked to join their first Quilting Bee. How exciting. It's my first bee and something I've always wanted to do. The idea is that each month you make a quilt block for somebody else and then one month everybody makes a block of your choice for you. Thus, getting a quilt made much faster than you could do it yourself. Yes!! Sign me up!

A few days ago I got some fabric in the mail and even learned something new when piecing this Envy block together for Rebecca at Pieces and Cream.


It's great looking up ideas for my quilt block that everybody will make. I'm also looking forward to getting my hands on some Flea Market Fancy when it comes out in February!

Friday, January 20, 2012

first step preschool, next step Harvard

I've done it. I've turned into one of those mothers. The kind that stresses about things that probably won't affect the future at all and one that will stand in line in the sleeting snow to sign their child up for preschool. Ok, so not the sleeting snow, but you get the point.

Next month I'll be signing Charlotte up for 3K and we'd decided to send her to one of the local Catholic schools. However, this school seems to be a little more competitive to get into because the parish is so large. There are already 12 kids signed up and only 18 can be in the class. That leaves me with six spots to try and fit my kid into. So yes, at 9:30 a.m. I'll be at the school with my paperwork already completed ready to push anybody over to get my kid enrolled. The way I'm handling it, you'd think she was trying to get into Harvard this Fall.

Since when have mothers started caring so much about preschool? I'm fairly new to mothering so it's always been this way to me, but was it always this way? I do promise my children I won't let them have filled calendars by the age of five. Sure we are always out-and-about, but having scheduled activities that you can't-miss-no-matter-what every day of the week? No thanks. Not when they still have the opportunity to just be kids.

I know it's ok if she isn't one of the six to get into the class. There is another great Catholic school in the other direction only two miles away. I'm sure she'll get a great preschool education there as well. Besides, PBS has already taught her everything she knows. I think PBS is like Harvard for toddlers. 

Wednesday, January 18, 2012

circa 52 new wave quilt

Here is the second quilt I've made that the Senior Planning Group (Mom's business) will donate to the Southeastern Wisconsin Alzheimer's Association's Mardi Gras (annual fundraiser gala). I really hunted for a little boy fabric line that would match the Kona Medium Gray I already had on hand. Finally, at Fabricworm.com I found the Circa 52 by Monaluna for Birch Fabrics. I absolutely love the retro feel to this organic cotton. There was even grey in the patterns. The owls in the tree, the rocket ships....just adorable! Finished size approximately 51" x 54"
new wave front
Like the other new wave quilts from Elizabeth Hartman that I've made, I parallel quilted it with straight lines. The back really shows off the quilting and it looks great. I sure hope this quilt reaches a hefty bid in the silent auction. It is sure to make some little boy happy.
back of quilt

Saturday, January 14, 2012

new year, new kitchen

I'm impulsive. Yes, I am.  Last Sunday I looked at the kitchen and said to Kevin, "I want a red kitchen." He agreed. We both hated the strange periwinkle blue that made the kitchen feel cold and open. The rest of our house is very warm feeling (so I think) and with my love for red, and the desire for a red kitchen, I jumped on it. Monday I came home with paint samples and a gallon of ceiling paint.
original kitchen during walk-through
Enter Thursday, three coats of red Cherry Cobbler paint and lots of blue tape, I have a red kitchen. It turned out amazing!  We picked the perfect color of red! It's warm, but not too bright, and just makes you feel all fuzzy inside. I think it's inviting! "Common in! Stay awhile and have a drink! Let me make you something tasty to eat!

To get a good paint line, let me share a tip I read and tried. This only works with painted woodwork. After putting down the blue tape, I painted the seam with the matching white color. That way, when I went over with the red, if anything bled through, the white did, not the red. It worked really well. I have a few errors, but this really helped keep them to a minimum.

Here's a not-so-great picture of the only full wall in the kitchen.
Behr Cherry Cobbler in Satin finish

Thursday, January 12, 2012

baby girl wonky blocks quilt

January. The month I've started making a baby girl and boy quilt that Senior Planning Group (Mom's business) will donate to the Southeastern Wisconsin Alzheimer's Association's Mardi Gras. Baby, or in this case, toddler sized quilts are fun to make because they are finished so fast. Nice, short projects. The fabric is Veranda by Amanda Murphy for Robert Kaufman. I fell in love with all the pinks, oranges, and bright greens. The tulips were a favorite too.  I've made this pattern before, Elizabeth Hartman's wonky block 9-patch, but loved it enough to make it again.

I stippled it in an all-over curly cue and used a bright green thread to match the background. Turned out great once washed.

post signature
Visit Top Mommy Blogs To Vote For Me

Sunday, January 8, 2012

fancy underwear

Standing this close to the finish line, I never thought I'd cross it! Charlotte turns 3 on March 1st and she was still pooping in her diaper and really not caring about it. Being the sassafras that she is, nothing seemed to work to get her to poop ON the potty. Quite frankly, I got sick of it.

Hearing a story from a family member, I started putting her in the bathtub to have her take her own dirty diaper off. This totally backfired. She liked doing that and wiping her own butt. Crap....so much for THAT  plan of trying to gross her out.

Jokingly, I said I was going to giver her a cold shower to wash off the poop. Charlotte said "ok" and I said "no", but she insisted. So, I turned the shower head on. Yes, you can picture it. She cried and screamed. No, I'm not a bad parent. I'm a desperate parent.

Long story short, about a week later, my oldest daughter is wearing fancy underwear. Yes, she made a 3.5 hour car ride, twice, with undies on. She's made it 4 days in a row with undies on. Today she said, "No more cold showers and baths Moms." Finally!! I've made it out of unnecessary poopy diapers. She's even stopped playing and dancing to run to the potty.

Let me just say again how proud I am of Charlotte (and excited)! She loves wearing her fancy underwear and I love seeing her cute little butt instead of a bulky diaper. She's even been dry at night and naps a few times (which I know she can't control).

I suppose I also forgot to mention that the Angry Birds sure helped with this feat. She was desperate to have the giant, black angry bird that made bomb noises. Now we have an entire collection, but at least there's no more poop to clean up!!
P.S. I've invested money into flushable wipes.

post signature

Sunday, January 1, 2012

nigella's chocolate-raspberry tarts

Kevin's birthday is a few days after Christmas and New Year's. After chowing sugar for a few weeks straight, he opts for the less-sweet desserts at his birthday. This year's pick, Chocolate-Raspberry Tarts from my How to be a Domestic Goddess cookbook by Nigella Lawson. It was a new recipe for me too. I haven't really tried anything new lately so it was refreshing to have a new taste around here.

I've always loved mascarpone filling. This Italian cheese is so creamy but not really sweet. Paired with the white chocolate, I knew this would be a wonderful dessert. Fairly light too (not in calories, sorry folks).

The recipe talked about how difficult the dough was to work with but I found no difficulty, so don't let that deter you from trying this out. It was easy to get six tarts from the dough.


Ingredients for tarts:
- 1 cup + 2 tablespoons cake flour (I even used regular flour)
- 2 tablespoons cocoa powder
- 2 tablespoons sugar
- ¼ teaspoons salt
- ½ cup unsalted butter
- 1 large egg yolk
- 1 tablespoon ice water

Ingredients for filling:
- 2 ounces white chocolate
- 1 cup + 2 tablespoons mascarpone
- ⅓ cup + 1 tablespoon heavy cream
- approximately 2 pints raspberries

Instructions:
- Your best bet is to make the pastry in a food processor, so put the flour, cocoa, sugar and salt into the bowl and pulse to blend. Cut the cold butter into small pieces and pulse with the flour mixture until it looks crumbly. Beat the yolk and iced water together and add, down the funnel, to bind the pastry. When it starts to clump together, turn it out of the processor and work it together with your hands into two discs. Wrap them in plastic wrap and rest the pastry in the refrigerator for at least 30 minutes.
- Roll out one of the dough discs; it will be quite a dry pastry because of the cocoa, so don't be too heavy-handed with the flour on your rolling surface. Then, using a tart pan as a guide, cut at least 3 rough squares or circles slightly bigger than the pan. Ease the pastry squares into the tins - don't worry if they break, just patch them as best you can - and cut off the excess pastry. Do this with all 6 pans, and then freeze them for about 30 minutes or until they feel frozen. While the pastry's in the freezer, turn on the oven to 350°F (180°C), and slip in a baking sheet to heat up at the same time.
- Put the tartlets straight into the oven on the baking sheet, and cook for 10-15 minutes or until the pastry feels cooked and dry. The freezing plus the fact that the individual area is small means that they shouldn't puff up, which in turn means we're doing without the beans and all that blind-baking palaver. While the pastry's cooking, you might melt the chocolate for the filling, either in the microwave or in a double boiler.


So, Happy 32nd Birthday to my Hubby. Maybe 2012 be a great year for you!

post signature

year in review

I can't believe the year is already over! Where did 2011 go?? I knew the moment Gretchen was born the year was going to fly by. Little did I know it would fly by THIS quickly.

Here's our year-in-review.

In January, we added a bundle of joy to our lives. She was baptized in May.

Charlotte turned two in March.

In April, we celebrated our 4-year wedding anniversary but sadly, didn't go anywhere.

In May, we listed our house on a whim and sold it in 9 days. 

So, we moved in with my parents for almost 8 weeks. Thanks Grandma and Grandpa!

In June we went to Door County to celebrate a friend's wedding and ended up driving back to Oshkosh to pick up Gretchen, my 5-month-old baby who wouldn't take a bottle. At least she was a good girl and didn't spoil the entire weekend.

In July we bought our first house together. It's been a wonderful fit for us. Kevin also went to Alaska without me and had a great time visiting one of his closest friends. 
 

In August, Charlotte was finally not afraid of swimming and learned to swim with only water wings!

In Fall, the cabin was finished and we made many trips up there. The girls love it there! I can't wait for summers and winters to come.

Gretchen, of course, hit many milestones and continues to warm our hearts with her smile.

And, we got to really see the girls light up when Santa came this year.

That's our year-in-review. So much more has happened, good things and bad. Kevin lost his Grandpa, I lost a cousin, and really good friends of ours lost a baby. We hope that 2012 brings more joy and less heartache. Unless, of course, the world ends next December. As a resolution, we will be going to church more.

Our hopes for 2012:
  • One less child in a diaper
  • The start of 3K for Charlotte
  • Two family weddings....
  • Another baby (but not quite yet)
  • Gretchen walking and running around the house
  • A more frugal mind
  • More laughter
  • Lots of family visits and good food
May your new year hold hope. Make it a resolution to start out on a good foot-- call your family, call your friend, thank your spouse, thank your parents, mend that friendship, and be a nice person, all the time.

post signature

LinkWithin

Related Posts Plugin for WordPress, Blogger...